If you’re like me, you probably try to forget visits to the dentist. I’ve spent enough at the dentist to by a vacation home. Well, not quite but you get the idea.
How does this relate to content marketing?
Because my dentist reinforced what I always knew about people’s fear of being on video.
They just don’t like the way they look.
My dentist told me that the cosmetic dentistry side of his practice got a big boost during the pandemic because people spent hours in virtual meetings. Which meant hours of looking at themselves on Zoom.
All that face-time with themselves sent many to the dentist for caps, crowns, tooth whitening, and more, and likely to the dermatologist as well.
If being uncomfortable with the way you look on video — social media videos, LinkedIn®️ Live broadcasts, virtual presentations, etc. — is holding you back, I have a cheaper solution for you.
Actually a few.
A recent conversation with a good friend about this topic prompted me to create this issue.
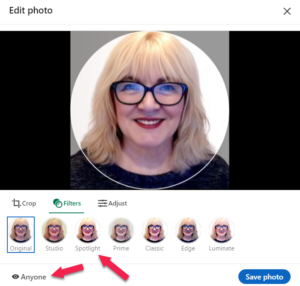
LinkedIn®️ Headshot
It’s easy to look better on LinkedIn by adding a filter to your Headshot photo.
To access the filters
🔹Click on your headshot
🔹Click on Edit
🔹Click on Filters
🔹Choose the one that works for you
➡️ And while you’re there, make sure your photo is set to Anyone.
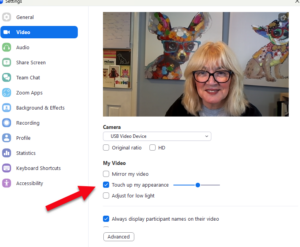
ZOOM Camera
Zoom has had the option to touch up your appearance for a while. Unfortunately, there are still a lot of people who aren’t aware.
To access the filter
🔹Click on the arrow next to Start Video
🔹Choose Video Settings
🔹Click Touch up my appearance
🔹Adjust the touch up as much or as little as you like
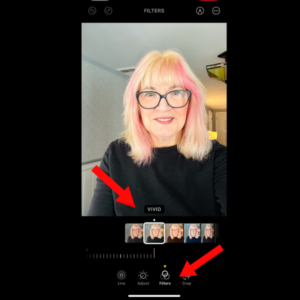
iPhone Camera
Who loves the way they look in photos? Not me. But iPhone makes it easy to look better in photos and videos with a series of filters.
To access the filters
🔹Tap a photo
🔹Click Edit
🔹Click Filters (on the bottom menu)
🔹Choose the filter that works for you
(Yeah, I had to share the photo with the pink hair 🤣)
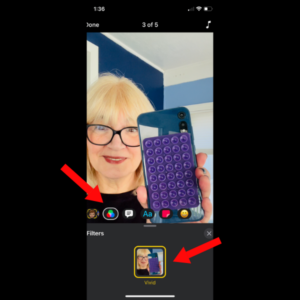
Clips App iPhone
If you’re new to recording short-form video, and you have an iPhone, I highly recommend that you begin with Clips a free app that lets you record, edit, and caption videos, and do a whole lot more.
To access the filters
🔹Click on the STAR (lower right)
🔹Click on the RGB image
🔹Choose the filter that works for you
➡️ Note: You can add filters to your video before or after you record. But, if you do it after, you need to add them to each clip.
Moving Forward
Remember, authenticity is key in content marketing, but there’s nothing wrong with using tools that help you feel more comfortable and confident on camera.
Next time you’re feeling uncomfortable about recording a video try one of these filters out. They might help you focus on your message instead of a wrinkle (or blemish) or two.
That’s it for today, I hope you picked up a new trick that you can pass on to a friend.
Particularly if she’s a 50+ woman like me.